Friday, September 27, 2013

31dc2013 Day Twenty

31dc2013 Day twenty: Water Marble


         First off I would like to say this was another first for me. I never tried this technique before simply because of how labor intensive it seems/ looks. I've also read that it's pretty hard to perfect. For me it seems like another design that works best for people with long or bigger nails then I, but i suppose it wouldn't be a challenge if it was all easy right? So here we go with my attempt, and by the way, I chose to only do my thumbs middle and ring finger with the water marble technique. The rest of my fingers I kept plain-ish.
     Since it was my first time trying this out I wanted to start simple with a 2 color marble.
       Sorry that ones a little grainy, I have a few other shots that will hopefully show the look off a little better.
        The two colors used are Sinful Colors "mesmerize" which is a dark blurple (blueish purple, purplish blue?) and Julep "Sasha" a nice coral shade.
      I added the dots with a dotting tool to add some more color and interest to the finished look. My top coat smeared it a little bit but you certainly couldn't tell from a distance.
      The finished result was kinda trippy and cool. I want to try this again the clean-up wasnt nearly as bad as I feared. I liberally applied cuticle oil around the nails before the water-marbling to make it  a bit easier. So there it is!

   Steady hands to all!


31dc2013 Day Nineteen

31dc2013 Day nineteen: Galaxy nails


            OKAY, so take it easy on me okay?!? This was my first attempt at galaxy nails ever! I see beautiful photo's of this style manicure all the time but never tried it because I figured my nails were way to small to have all that going on them. I still gave it a shot though.
         I started with a coat of Sally Hansen "Black out" for my base. I ripped up one of those wedge make-up sponges.  I gathered up a blue , purple, yellow, and a light blue polish. put a dot of each color on some wax paper, took a piece of sponge for each color and starting with the darkest color started sponging in lines or circles. So first Dark Blue, then medium purple, some yellow, and then because I couldn't find any of my white polishes I used a super light blue for the stars added last.
     I think I got a little sponge happy with the purple. eek.
      Eh not the best, but not the worst either.  I will certainly try this again if for nothing else but to try and perfect it.  What do you think of my first attempt?

     Steady hands to all!


31dc2013 Day Eighteen

31dc2013 Day eighteen: Half Moons
       I love the look of half moon manicures, it can be done so many different ways to achieve different looks, but I feel with simple colors it's a fabulous classic look. As I've mentioned in other posts I love combining creme polishes with something sparkly. When It came to half moon day I knew what I wanted to do!
       I started with two coats of Julep "Sienna" Which is a beautiful white gold metallic polish. This polish has great coverage for a metallic, it's also just very pretty. Now this is where patience is a virtue. You MUST let the bottom coat fully dry! I've seen people use binder enforcers for their circles, but for some reason I can never find them in any of the office supply stores around me so I just use band-aid ends. So once your base is dry you can place your sticker, band-aid, tape or whatever you may be using over the bottom of your nail bed making sure the corners of your nails are fully taped off. I noticed if you touch the sticker or band aid a bunch to get rid of some of the stickiness, it makes the removal a little easier and tends not to pull up your base coat.
        I then went over the top of the nail with just one coat of Zoya "Farah", and then removed my band-aid to reveal the pretty gold underneath. Zoya Farah is such a great neutral polish! it has great coverage and I think it suits my skin tone really well. I may have to get another bottle because I use this one so often. It levels itself out so nicely and has great coverage for something so pale. As you can see from the photo's one coat even over gold was enough for full beautiful coverage.
          I went over it all with some topcoat just for some extra shine.
       SO PRETTY! I personally loved this combo and will probably where it again. I think it would make a nice accent nail. I also think this look is neutral enough for the office, but fancy enough for the office party (not that I would know, I work in a record store pretty much by myself). What do you think of this look?


     Steady hands to all!


Wednesday, September 25, 2013

31dc2013 Day Seventeen

31dc2013 Day seventeen: Glitter nails
       First off let me apologize for the graininess of some of my photo's. My little macro lens is either no longer compatible with my crappy phone, or my crappy phone is getting crappier. I'm working on a different photo set up. Yes, now back to nails. For glitter day I decided I wasn't going to do any nail art. Instead a swatch of a pretty cool and different glitter polish from my collection.
        Here we have 3 coats of color club "fame and fortune".  A bright pink/ magenta tinted jelly with iridescent shards.  I love how squishy this polish looks! The shards in this polish are much thicker then regular flake glitter. They almost look like little pieces of a broken mirror. This polish is quite sheer but does build well just make sure you let each coat dry before adding the next or you'll end up with bald spots.
     Minimal placement was required for the glitter but nothing unmanageable. I Imagine this would be a tough polish to pull off on longer nails if you have a problem with visible nail line, but since my nails are so tiny it works.  Have you tried Fame and fortune on your talons? if so what were your thoughts? I Like it, but mostly because I love most jelly polishes. Until next time!

    Steady hands to all!


31dc2013 Day Sixteen

31dc2013 Day sixteen: Tribal print
      Okay, I didn't make it to the store. I still wanted to give it a shot anyway. Since my delicate print was such a fail, I decided to only try to do the tribal print on my middle finger and thumb. I also tried a new (to me) technique on my pointer and pinky fingers called saran wrap nails. I also added a glitter nail (my ring finger).
      Not sure who coined the term, but I suppose this would be called a skittlette manicure.
On my thumb and middle fingers i started with two coats of julep "niecy" Which is a bright bubblegum creme. For my pointer and ring finger I started with a coat of "Rainstorm" by sinful colors. After that dried I painted a thin coat of julep "jessica" and took some bunched up plastic wrap and dapped up some of the color to create a marble look. To me it almost looked like acid washed jeans which looked pretty cool with the bright pink! For my ring finger I added 3 coats of julep "oscar" a pretty dense gold glitter.
     Once my base polish was dry I free handed a simple design over the pink nails. Finished it all off with a coat of extra shiny top coat and voila!. Not the best but certainly better then my previous post. What's your favorite nail art tool for doing small line work?

    Steady hands to all!


31dc2013 Day Fifteen

31dc2013 Day fifteen: delicate print

    Well one thing I can say is that this was certainly a challenge! Not only was I feeling down, and having a hard time keeping motivation, I was feeling a bit under the weather. Which certainly does not help my patience or my shaking. I get asked quite a bit if I have a problem or what not because of my shaking but all in all it's a family trait passed down my mothers side of the family which is probably one of the few things I got from her side of the family tree, yippee! Well anyway I tried a few different designs and pretty much messed them all up (to my standards anyway). This challenge was difficult for a few reasons. 1.) I have pretty shakey hands  2.) My nails are extremely small (like seriously I know 5 year olds with larger fingernail beds) 3.) I dont have many small paintbrushes and or nail pens, so my ideas become pretty limited.
     So anyway the photo above was my attempt at a paisley print. I definitely need a smaller nail pen or bigger nails haha.
    My attempt at a lace design.
        Ultimately a fail. For some reason my fast dry top coat was making my base polish really gummy, and actually making it take LONGER to dry. When I tried to apply my lines the brush kept getting stuck and dragging the base polish. 
     Last and maybe least, I tried a Henna design. I had the same problem with the brush getting stuck. Was it my fault for being impatient? probably. I think tonight when I get out of work I'm going to pick up some small brushes and maybe a new nail art pen or two and some freakin' seche vite for gods sake why don't I have any seche vite?!?!?!?  erm....yeah...

     Steady hands to all!


Wednesday, September 18, 2013

Just a silly swatch!

     Alright I'm back! This post I wanted to show you a swatch of a polish I picked up over summer. This will be a short post I promise!
     This is two coats of Sally Hansen fuzzy coat in "all yarned up" over a random light blue (sorry I can't remember what color I used). All yarned up is a combo or yellow, orange, and blue small bar glitters in a clear base.  I've noticed a couple other brands releasing these. Barry M has a line of confetti polishes they are practically the same exact collection. Nails inc have a feather effect line that is also very similar, and China glaze has a on the horizon set that also has these tiny bar glitters but in slightly different shades.
       This polish does remind me a little bit of a fuzzy sweater! It applies pretty nicely not much dapping and no fishing was needed to get an even application. Some of the bars kinda stuck out of the nail line but could easily be pushed to even out. I would love to try this polish in a jelly sandwich, maybe i'll post one in the future. Will any of you be picking up any of these or have you already?

    Steady hands to all!


Just some nail spam

  So far all my posts have been apart of the 31dc2013, which i'm still planning on continuing, I just wanted to post some other looks i've done. The first look is from the summer time. I live in upstate NY and it's already starting to get a bit chilly here which leaves reminiscing about summer so I had to post these.
      Ooooo Tropical! haha!  I had been eyeing this design since last summer and finally decided to give it a shot. I started the look with a gradient using yellow, orange and red.
     I even liked the way they looked before doing the design. Very bright but for some reason kinda cozy.
     I simply added a black line across the top of my nail. I then did one or two lines up from that. I added some lines from the top of the line in the middle of the nail and added squigles over it to make them look leafy. I did all the line work with a nail art pen in black. This was a pretty easy pattern to replicate and I was super happy with the outcome. I can't wait until next summer (or perhaps a tropical winter get-a-way, husband if your reading HINT HINT) to try this look again!


     Steady hands to all!


Tuesday, September 17, 2013

31dc2013 Day Fourteen

31dc2013 Day fourteen: Flowers
    I've never been big on floral prints, and I've actually have never done ANY floral nail art.  All I know is that I wanted to use NYC wine bar. Really loving this color lately. I also knew I wanted to do something simple since I had never ventured into the realm of floral nail art.
    I started by painting two coats of sephora OPI "under my trench coat" as my base. Under my trench coat is a slightly shimmery greige or khaki grey.  I then used my dotting tool to make simple dot flowers  using NYC wine bar (or fried egg flowers as I like to call them), Then added a little yellow dot in the middle to finish the flower.
     Overall I liked how the colors went together.  Next time I try this i'll try using a smaller dotting tool just so I can add more flowers to each nail. So that's all for today,

    Steady hands to all!


31dc2013 Day Thirteen

31dc2013 Day thirteen: Animal print

     As mentioned in my previous post i've been a little uninspired lately, so excuse the lack of imagination for my animal print. Just a simple leopard print from me today.  I do love me some leopard print though.  I also love the combo of glitter with a creme polish.
    For the base I used sinful colors "zincing of you" which is a sheer shimmery gold with extremely tiny micro multi colored flecks. I used three coats for full opacity.
    I then took my dotting tool and made brown spots with china glaze  "Mahogany Magic". Once that dried I used my black nail art pen to go around the brown. Topped it all off withe a generous amount of top coat.
     Voila! easy peasy. This is such a fun easy look that can be done with practically any color combo. It's a go to design for me. What about you?


   Steady hands to all!


31dc2013 Day Twelve

31dc2013 Day twelve: Stripes
   

     Normally I start my posts with a picture. Today i'm going to start off with a little disclaimer.  I had a very hard time with this, and not because I can't paint straight lines, just because I was lacking inspiration, motivation, or patience for that matter. Everything I tried came out looking like crap. First I was going to do some Steelers inspired stripes (my husband is a huge steelers fan), but that didn't work.
   See total crappola! This was my second attempt and still terrible. Then I thought maybe a blue purple brown stripe combo would work nice, but my hands we're being shakey and I couldnt concentrate. bleh.
     It looked wonky so I thought maybe adding some Julep melissa would finish it up. NOPE still terrible.
      Even fuzzy and far away I wasn't into it. After this I just took my polish off and went to bed. Messing up my nails that many times made me so frustrated this is all you get for the stripes challenge. SORRY! oh-well

    Steady hands to all!


31dc2013 Day Eleven

31dc2013 Day eleven: Polka dots
    Hello again! Today's challenge is polka dots. There is something so simple and smart about polka dots. It's such a happy print in my opinion. I've already done a polka dot manicure using black and white for day 7 of the challenge, so I wanted to do something a little different. I've seen this gradient style polka dot manicure floating around the web for a while so I figured I would give it a shot.
    I started this look off with a coat of sinful colors "last chance" which is a dark green jelly polish. Then I did a diagonal sweep across the top of the nails in julep "Melisa" which is a opalescent topper.
     I then did a line of polka dots in Melissa along the line then continued on to the green. Then I used the green over Melissa. over all a very easy look to accomplish.
    I really like the way Melissa looked in different lighting. It had this very pretty shimmer to it.
Well that's all folks!

   Steady hand to all!


Friday, September 13, 2013

31dc2013 Day Ten

31dc2013 Day ten: GRADIENT NAILS
     I do a LOT of gradients apparently. I just really like the effect and it's fairly easy. I wanted to try something a little different so I decided to use some duo-chrome polishes to perhaps add to the effect.
     The color above is one of  my long time favorites! It's by Revlon and is called Khaki Zing. This polish is pretty old, I believe I wore it to my junior prom (which was many moons ago). It has been discontinued but still seems to be pretty popular in the duo-chrome world. It shifts between purple with a pink flash, dark grey, and green with gold flash. It's a really run color that goes with just about anything. The one down side is that it takes FOREVER to dry, which i'm pretty sure is just due to how old it is. It still applies very nicely though. I started my manicure off with two coats of khaki zing on my thumb, pointer, and middle finger. I kept the nail decal from the rainbow manicure on my ring finger to see how they hold up. Pretty good it started to pull away from my nail a little but nothing a little top coat wouldn't fix.
     Then I sponged my tips with Sally Hansen luster shine in "lava" which is a very pretty duo-chrome that flashed between gold, yellow, orange, and bright pink.  I also did two coats as a base on my pinky finger to mix up the gradient a bit (I sponged khaki zing over lava on my pinkie)
   I finished this gradient off with a coat of Zoya Opal. Which is a opalescent flakie glitter topper that tends to lean on the green side.
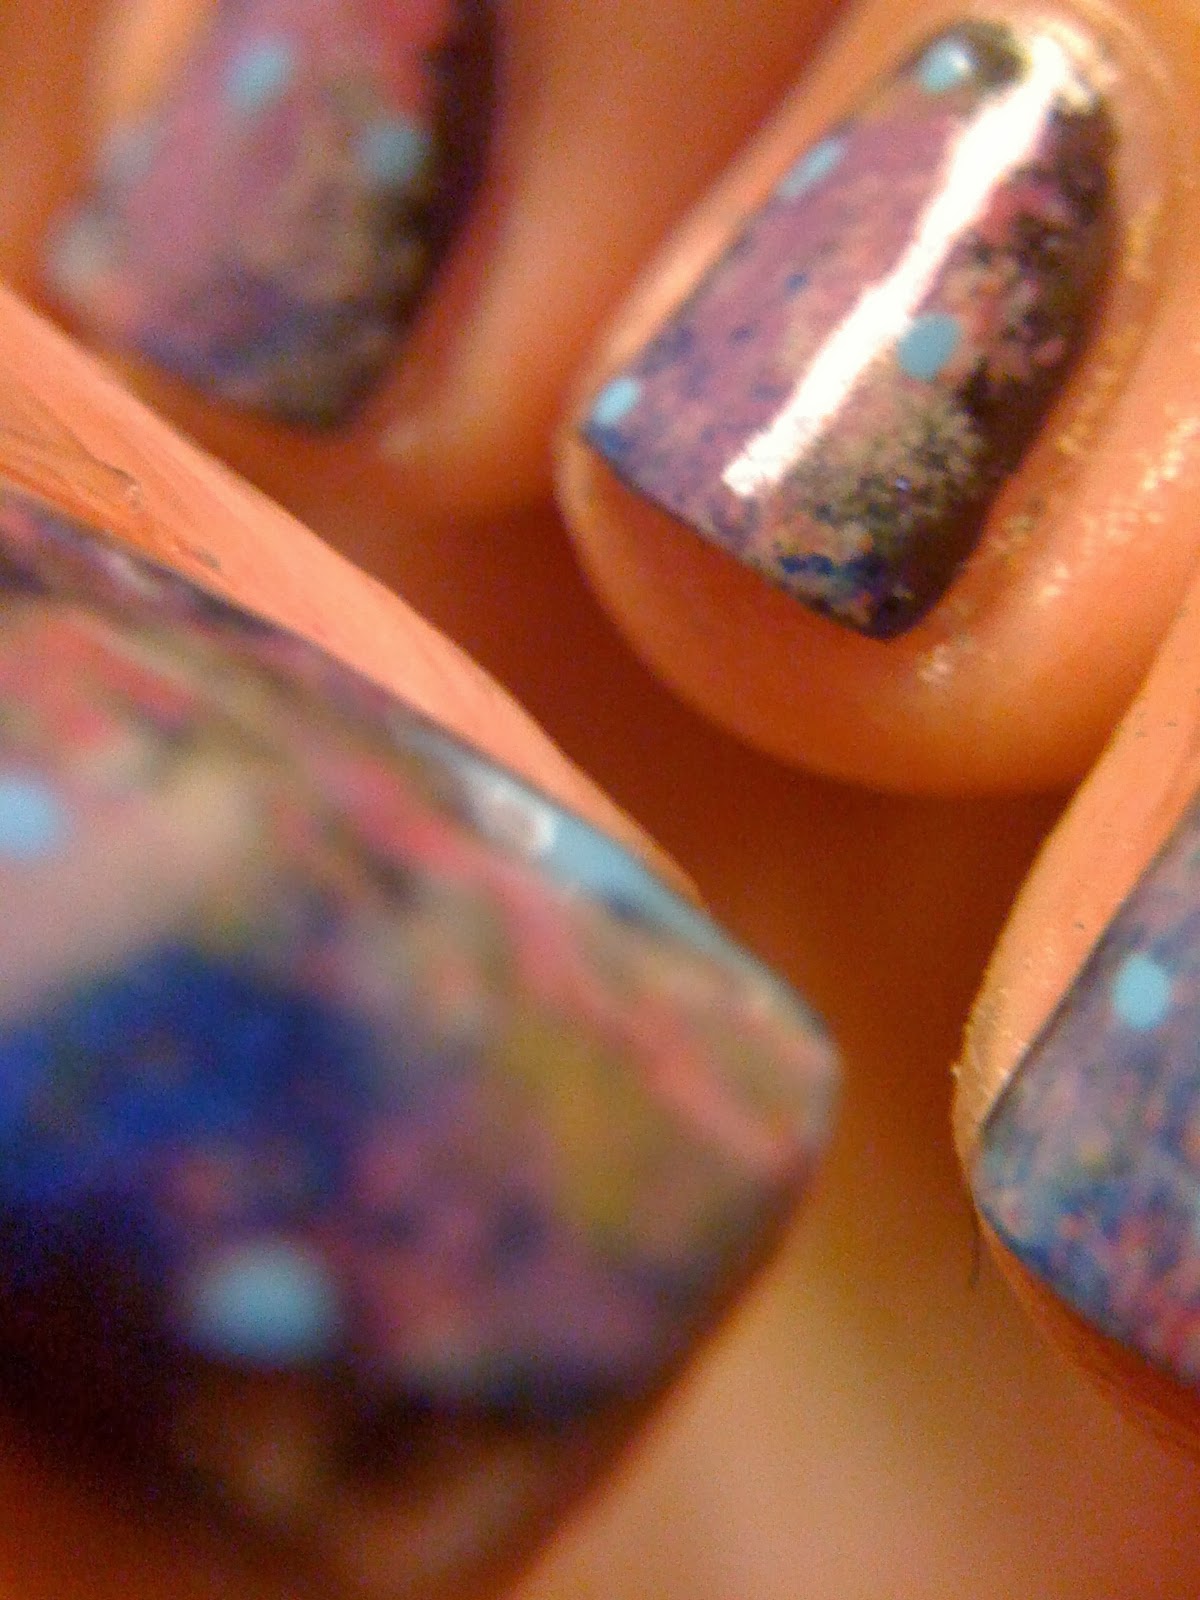
    I think this photo captures the shift the best, you can see at the bed of the top nail khaki zing flashes green/gold while lava is orange/yellow and on the bottom nail the base is a purple pink and lava becomes a pinky orange.
     The flakies really popped in natural sunlight! I think this manicure had a pretty majestic look to it. I like the way that these colors worked together very fun, interesting and eye catching (to me anyway).  I must say the removal of lava is kind of a pain. It's like a really fine glitter instead of being a pigmented base. Still a very pretty and wearable color, just remember the removal process and be time consuming.


   Steady hands to all!


31dc2013 Day Nine

31dc2013 Day nine: RAINBOW NAILS
    This may have been the first time i've done rainbow nails! Not to say I don't like rainbows, I just typically wear darker or more muted manicures. I has a hard time deciding what to do. There are SO many options: dots, stripes, gradients, watercolor, and so on... I decided to do something a little on the lighter side. I started by painting a rainbow gradient (can't remember which colors I used, sorry) directly to a makeup sponge, then I sponged all my fingers except my ring finger. I decided to use one of my "studded" nail wraps from Julep. I originally didnt think i would like these nail stickers because they are very textured, but they applied easily and did have a pretty cool effect. I like them used as an accent I think a full manicure would be a little much.
     I then went over my rainbow gradient with Milani 3D holographic polish #509. Which is a silver holographic micro glitter. I couldn't really capture how sparkly this is and how well it complemented the subtle rainbow effect. This is two coats over my gradient.
    I then tried my hand at stamping, by adding a zebra print stamp to my thumb. Which i'm pretty sure is my only finger most stamps will work on since my nails are so tiny.
    Not perfect, but not bad!  The white looked nice over the rainbow gradient so I was happy, although the white polish seemed to bubble a little bit when I added my top coat. It really wasn't noticeable.


   Steady hands to all!